Building a Swagger Client and Server with .Net Core
There are a few ways to create a Swagger client in .Net. For native Visual Studio users you can right-click on a project and generate them for the .Net Framework. However, I was looking for a way to consistantly generate a cross-platform client. Enter Autorest.
In this article I'll show how to create a Swagger-enabled .Net Core Api, and the build a cross-platform .Net client library that works in both .Net Core and the .Net Framework. In order to get started you should have nodejs installed.
Create a .Net Core website
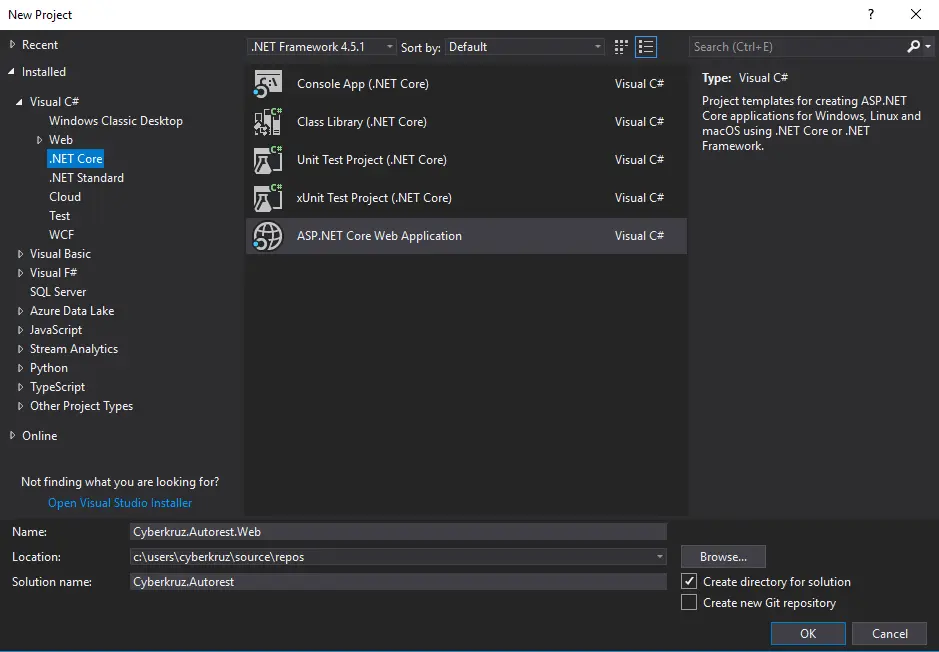
The first step is to create a swagger-enabled .Net Core Api. This should be pretty simple. Open Visual Studio and create a new Asp.Net Core website.
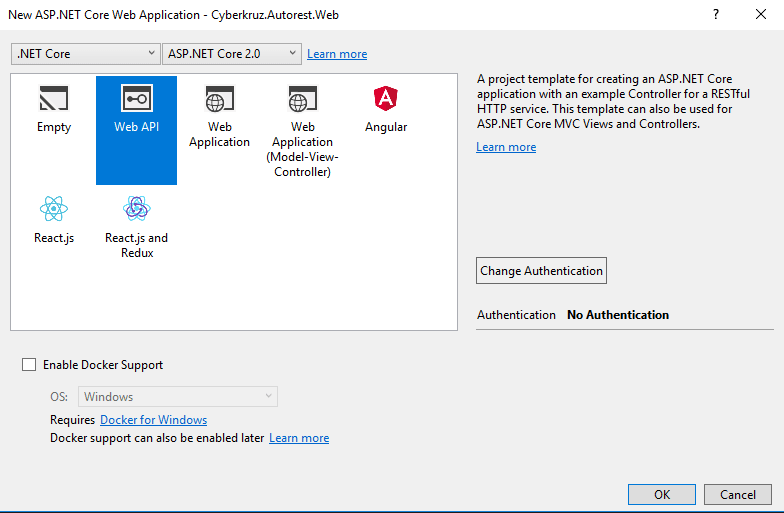
Now we need to add a custom model. So right click on the project and add a Models folder. Then create a class in it called Joke.
/// <summary>
/// A full model of a Joke to pull out of the API.
/// </summary>
public class Joke
{
    /// <summary>
    /// The joke's setup question.
    /// </summary>
    public string Question { get; set; }

    /// <summary>
    /// The punchline of the joke.
    /// </summary>
    public string Answer { get; set; }
}
After the model is created we can create a controller to return them. Right-click the controllers folder and click new controller. Make sure you select empty controller.
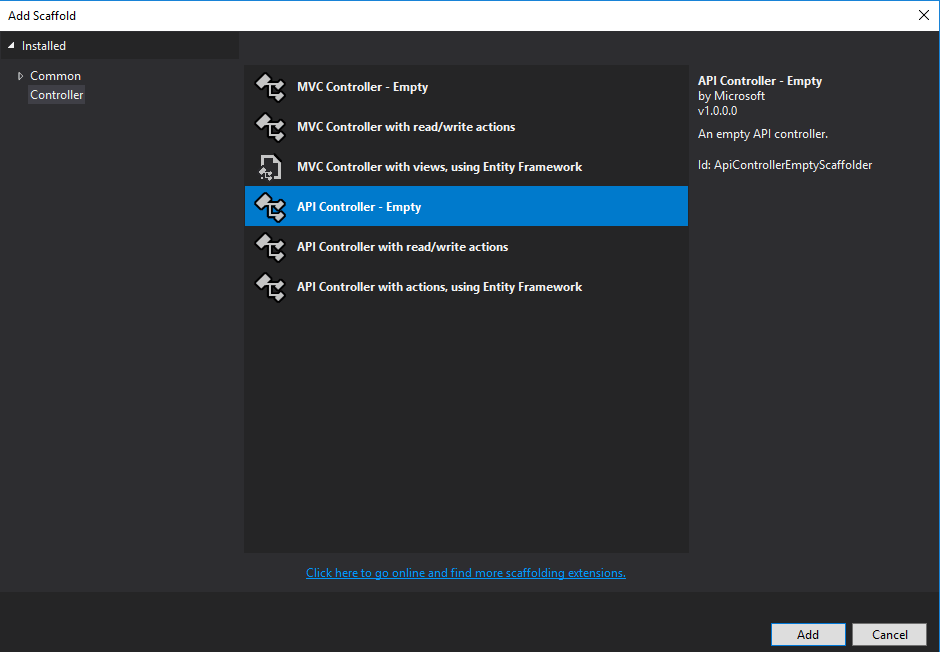
Now add a method to return some terrible jokes.
[HttpGet("", Name = "GetJokes")]
[ProducesResponseType(typeof(Joke[]), 200)]
public IActionResult Get()
{
    var jokes = new Joke[]
    {
        new Joke()
        {
            Question = "What do you call a boomerang that won't come back?",
            Answer = "A stick"
        },
        new Joke()
        {
            Question = "What horse never comes out in the daytime?",
            Answer = "A night mare"
        }
    };

    return Ok(jokes);
}
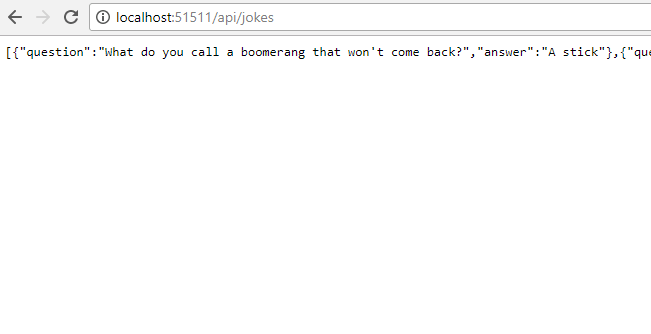
At this point you should run the application and make sure that it is working. Press f5 and navigate in your browser to the jokes url (api/jokes) and you should see your jokes.
The next step is to enable swagger for the controller. I generally edit my csproj file and by hand as the new csproj files are simpler to read and you get the most consistant results. You're going to want to change the csproj file match this one.
<Project Sdk="Microsoft.NET.Sdk.Web">

  <PropertyGroup>
    <TargetFramework>netcoreapp2.0</TargetFramework>
    <DocumentationFile>bin\Debug\netcoreapp2.0\Cyberkruz.Autorest.Web.xml</DocumentationFile>
  </PropertyGroup>

  <PropertyGroup Condition="'$(Configuration)|$(Platform)'=='Debug|AnyCPU'">
    <NoWarn>1701;1702;1705;1591</NoWarn>
  </PropertyGroup>

  <Target Name="PrepublishScript" BeforeTargets="PrepareForPublish">
    <ItemGroup>
      <DocFile Include="bin\$(Configuration)\$(TargetFramework)\*.xml" />
    </ItemGroup>
    <Copy SourceFiles="@(DocFile)" DestinationFolder="$(PublishDir)" SkipUnchangedFiles="false" />
  </Target>

  <ItemGroup>
    <Folder Include="wwwroot\" />
  </ItemGroup>

  <ItemGroup>
    <PackageReference Include="Microsoft.AspNetCore.All" Version="2.0.5" />
    <PackageReference Include="Microsoft.VisualStudio.Web.CodeGeneration.Design" Version="2.0.2" />
    <PackageReference Include="Swashbuckle.AspNetCore" Version="1.0.0" />
  </ItemGroup>

  <ItemGroup>
    <DotNetCliToolReference Include="Microsoft.VisualStudio.Web.CodeGeneration.Tools" Version="2.0.2" />
  </ItemGroup>

</Project>
That is a big change from what you started with so I'll do a bit of explaining. In the first property group I added automatic generation of the documentation file. This will output all of your xml comments to a single file that swagger can read. In the second property group I disable some of the xml warnings. Then I added a target to always make sure that the documentation file gets copied over on publish. This guarentees that the xml file exists when publishing the website, or you will get an error when the site gets published. Finally, I added Swashbuckle to the list of package references. Swashbuckle enables swagger for Asp.Net Web Api.
Now you can rebuild the project which should restore swashbuckle with Nuget. Let's add some code to enable swagger as a service. Open your Startup.cs file and update the ConfigureServices method.
// This method gets called by the runtime. Use this method to add services to the container.
public void ConfigureServices(IServiceCollection services)
{
    services.AddMvc();

    services.AddSwaggerGen(c =>
    {
        c.SwaggerDoc("v1", new Info { Title = "Autorest", Version = "v1" });

        var basePath = PlatformServices.Default.Application.ApplicationBasePath;
        var xmlPath = Path.Combine(basePath, "Cyberkruz.Autorest.Web.xml");
        c.IncludeXmlComments(xmlPath);
    });
}
Next, edit the Configure method to include swagger as well.
public void Configure(IApplicationBuilder app, IHostingEnvironment env)
{
    if (env.IsDevelopment())
    {
        app.UseDeveloperExceptionPage();
    }

    // Enable middleware to serve generated Swagger as a JSON endpoint.
    app.UseSwagger();

    // Enable middleware to serve swagger-ui (HTML, JS, CSS, etc.), specifying the Swagger JSON endpoint.
    app.UseSwaggerUI(c =>
    {
        c.SwaggerEndpoint("/swagger/v1/swagger.json", "My API V1");
    });

    app.UseMvc();
}
Finally, we can go back and update the JokesController to have some more endpoint information specific to Swashbuckle:
[SwaggerOperation(operationId: "GetJokes")]
[HttpGet("", Name = "GetJokes")]
[ProducesResponseType(typeof(Joke[]), 200)]
public IActionResult Get()
At this point you should be able to re-run the application and see the swagger endpoints by navigating to /swagger.

That should be all for setting up the server. Now let's create a class library to consume it.
Creating a Client
Right-click on your solution and create a new .net core class library.
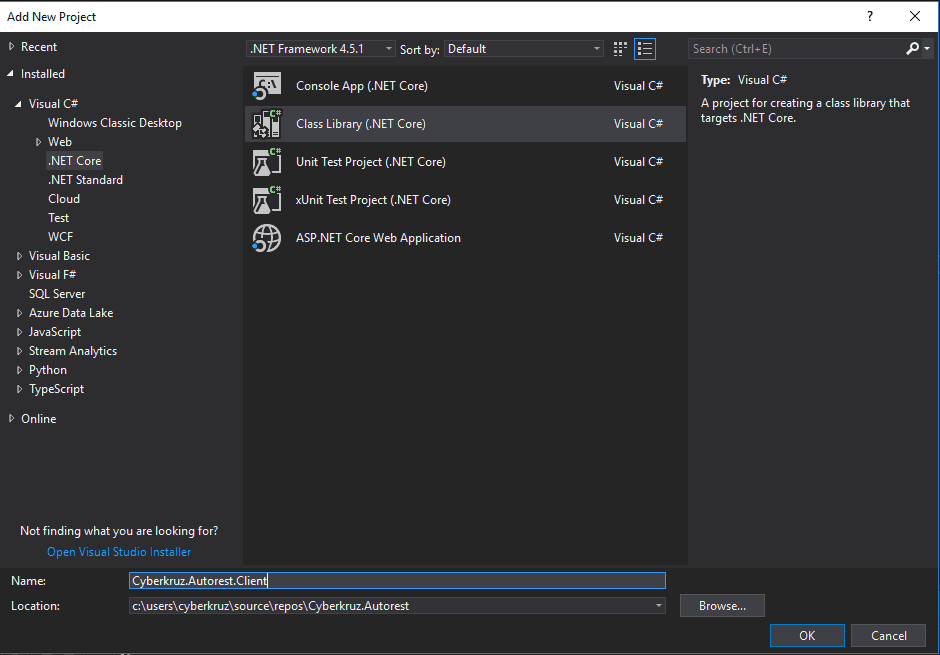
Once this class library gets created you can edit the csproj like before.
<Project Sdk="Microsoft.NET.Sdk">

  <PropertyGroup>
    <TargetFrameworks>net452;netstandard2.0</TargetFrameworks>
  </PropertyGroup>

  <PropertyGroup>
    <Version>0.0.1</Version>
    <Authors>Cyberkruz</Authors>
    <Product>Cyberkruz.Autorest.Client</Product>
    <AssemblyVersion>0.0.1.0</AssemblyVersion>
    <FileVersion>0.0.1.0</FileVersion>
    <Description>Test client using Autorest</Description>
    <PackageReleaseNotes>Creating a new client</PackageReleaseNotes>
    <Copyright>Cyberkruz</Copyright>
    <PackageProjectUrl>https://github.com/Cyberkruz/dotnet-swagger-client</PackageProjectUrl>
    <RepositoryUrl>https://github.com/Cyberkruz/dotnet-swagger-client</RepositoryUrl>
    <PackageTags>swagger</PackageTags>
  </PropertyGroup>

  <ItemGroup Condition=" '$(TargetFramework)' == 'netstandard2.0' ">
    <PackageReference Include="Microsoft.Rest.ClientRuntime" Version="2.3.10" />
  </ItemGroup>

  <ItemGroup Condition=" '$(TargetFramework)' == 'net452' ">
    <Reference Include="System.Net" />
    <Reference Include="System.Net.Http" />
    <Reference Include="System.Net.Http.WebRequest" />
    <Reference Include="System.Runtime" />
    <Reference Include="System.Runtime.Serialization" />

    <PackageReference Include="Microsoft.Rest.ClientRuntime" Version="2.3.10" />
  </ItemGroup>

</Project>
Again, there is a lot going on here so I'll try to explain. I updated the targetframeworks section of the first property group to build for both regular .Net and .NetStandard. This will allow the project to be used by Core apps as well as regular .Net apps without having to include the .NetStandard libraries.
In the second PropertyGroup section I just added some basic information about the library so there is metadata if it gets published to Nuget.
Autorest requires Microsoft.Rest.ClientRuntime in order to work. The bottom two ItemGroup sections add the required dependancies based on whether the library is being built via .Net Standard or .Net452. With all this set we can now generate the client.
Open a terminal and run these two commands:
npm install -g autorest
autorest --reset
We are using nodejs to install autorest globally. The second command adds all the default generators and updates them. Now we can generate the actual classes.
Note: Make sure you have the .Net Core Api we just built up and running or the next command won't be able to find it.
Navigate to the Cyberkruz.Autorest.Client directory and execute this command (make sure you replace the port number with the one from your webserver):
autorest --namespace=Cyberkruz.Autorest.Client --add-credentials --input-file=http://localhost:51511/swagger/v1/swagger.json --output-folder=./ --csharp
This should generate all the cs files, and your library is complete. Super simple!
Testing the client
It isn't any fun unless we can see it all in action. Add a .Net Core Console application to the solution.
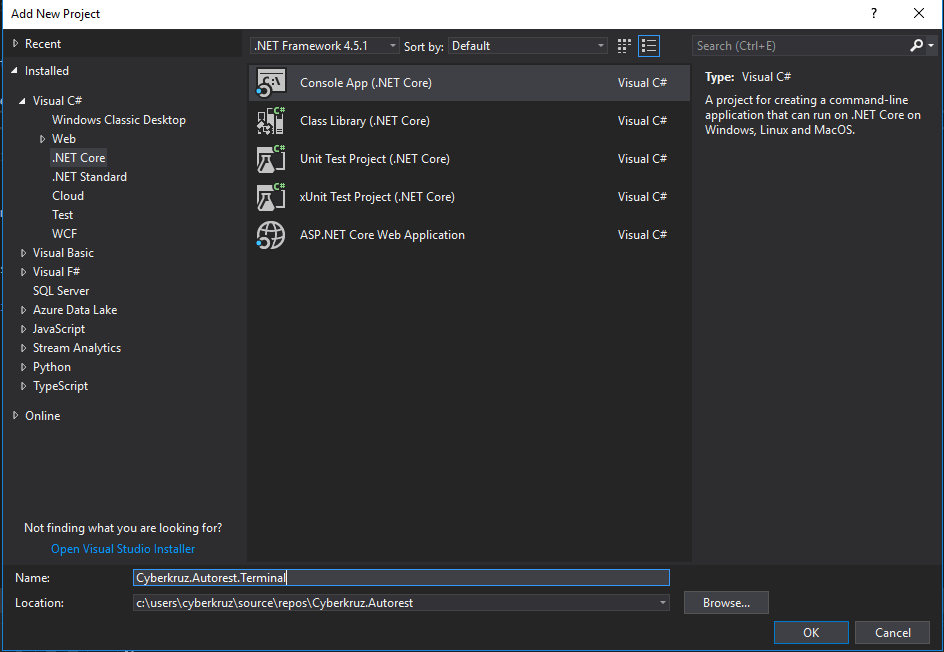
Right-click on dependancies and click Add Dependancy. Then add Cyberkruz.Autorest.Client as a dependancy.
Open program.cs and fill in the details (make sure you set the right port):
static void Main(string[] args)
{
    var client = new Cyberkruz.Autorest.Client.Autorest(
        new Uri("http://localhost:51511"), new BasicAuthenticationCredentials());

    var jokes = client.GetJokes();

    foreach(var joke in jokes)
    {
        Console.WriteLine(joke.Question);
        Console.WriteLine(joke.Answer);
    }

    Console.ReadLine();
}
Right-click on the solution and select "Set startup projects" and set both the console app and the website as the startup projects. Make sure the website starts before the console app.
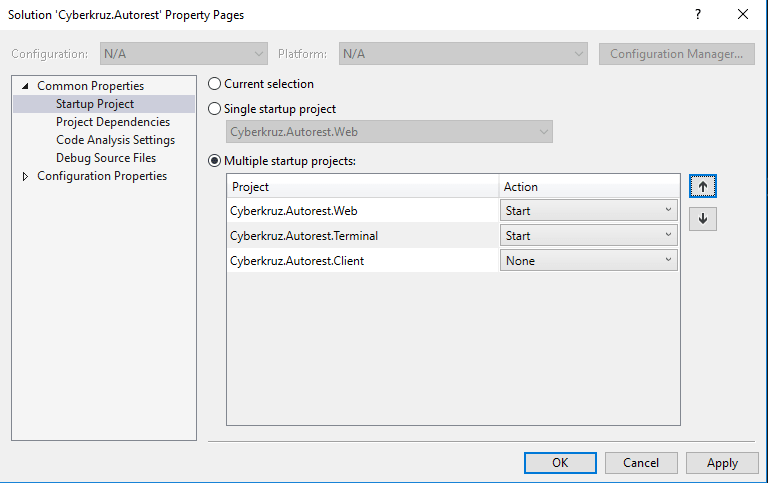
You should be able to run the application and see the results:
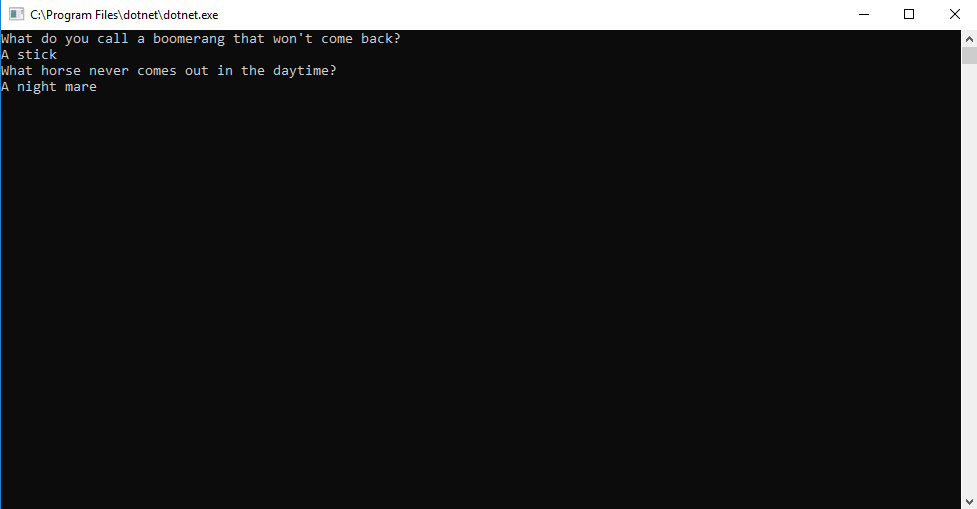
As you can see it's pretty simple to setup a rest client and server in .Net. Using Autorest and Swagger, you can generate the clients in most languages to be consumed by all sorts of folks. Hope this helps.