MSSQL Server on DigitalOcean via Ubuntu
I've moved several applications over to DigitalOcean since posting articles on configuring Kubernetes. Some of these applications use SQL Server, so I needed an instance. Although DigitalOcean doesn't have Windows droplets, SQL Server runs on Ubuntu without much work. There are a few articles out there on how to do this, but I'm posting this for posterity.
Create the droplet
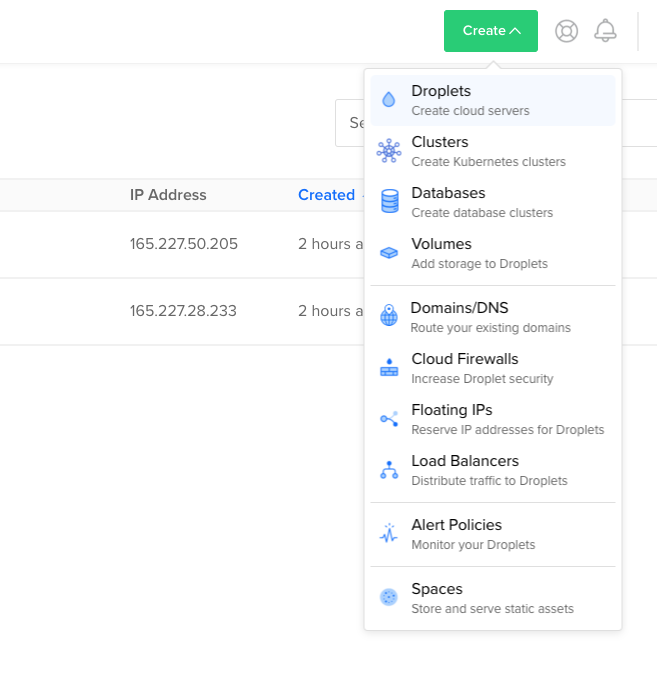
Droplets are servers created on DigitalOcean. They make it easy to spawn up new instances from the top menu anywhere in the dashboard.

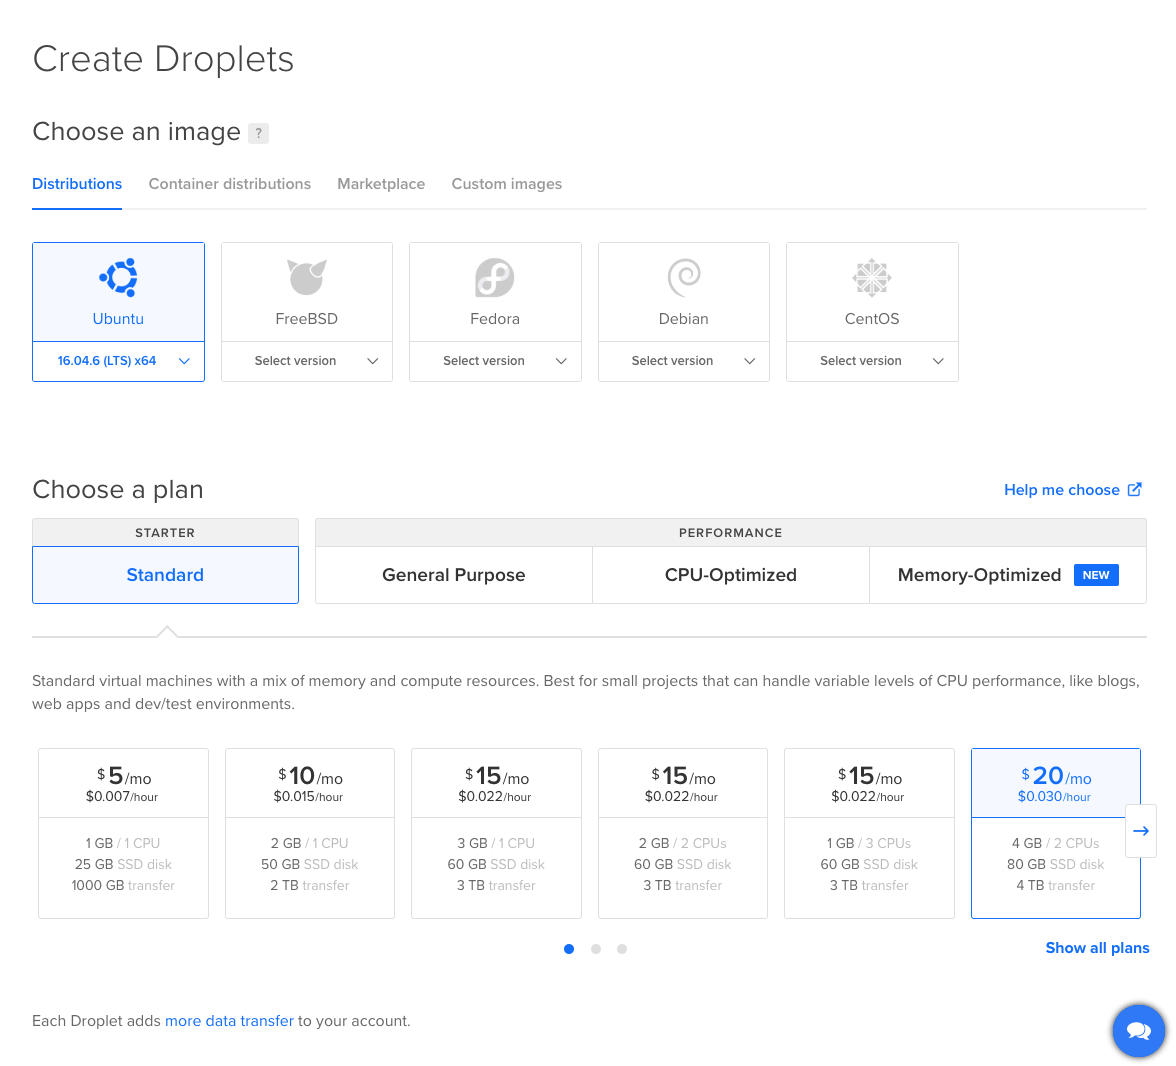
I used an Ubuntu droplet for my configuration. A few things to note. I installed the latest version of Ubuntu the first time, and ultimately had problems connecting to the server. Make sure you use 16.04.06. Also, MSSQL requires 4 GB of RAM, so up the server size to 4 GB at a minimum.

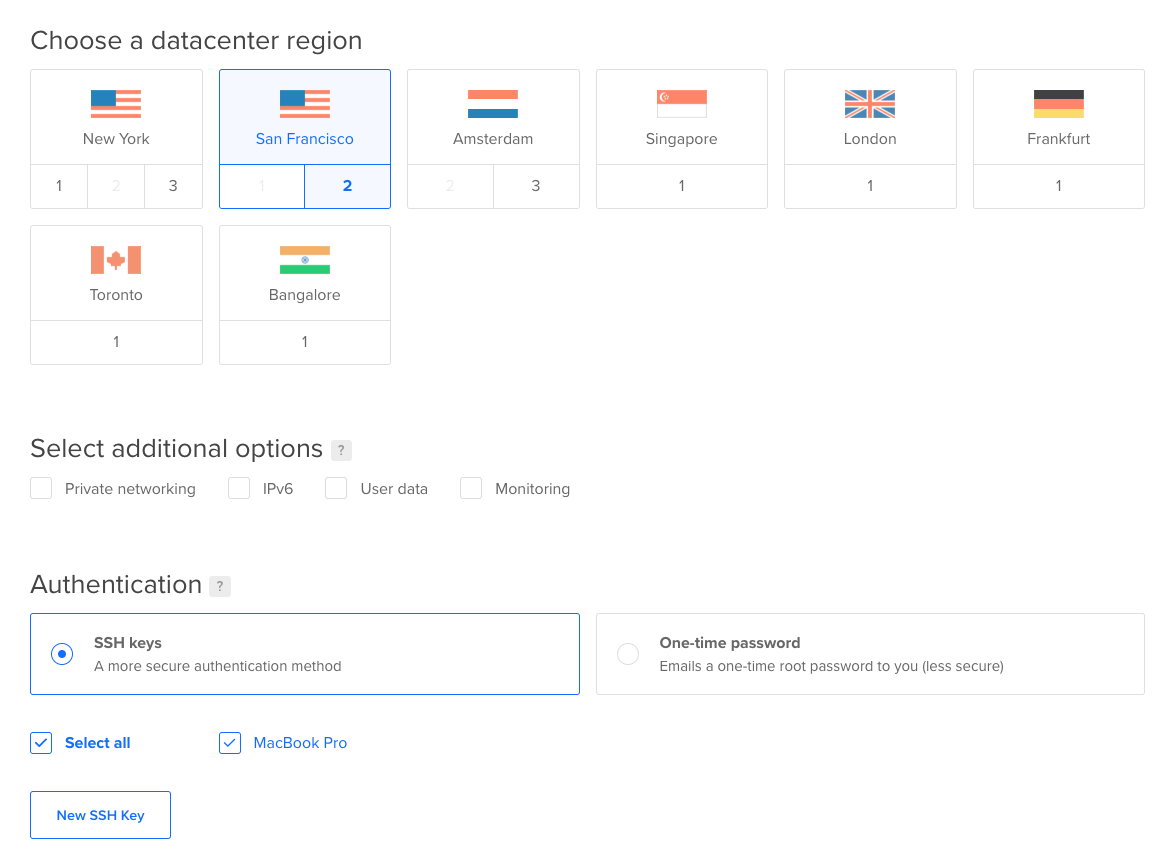
I selected the data center where I host my applications to limit latency and bandwidth costs. DigitalOcean prefers SSH authentication over password authentication for better security.

Generating an SSH key
If you don't have an existing SSH key, generate one. The process is relatively simple on Mac. Open up a new terminal and use ssh-keygen.
ssh-keygen
ssh-keygen prompts for the key location. The defaults are acceptable, but you can specify a different location if you're dealing with a lot of ssh keys. Enter the file in which to save the key (/Users/yourusername/.ssh/id_rsa. Enter a password to secure the key, and then verify the key exists.
cat ~/.ssh/id_rsa.pub
Take the results of your new key and paste it into the DigitalOcean prompt.
Connect to the server
While the droplet's provisioning, you'll be taken to a status page. Once it's done provisioning, you can connect to the server to start doing the real work.
ssh [email protected]
Or, if you saved the SSH key in a different location, you can pass the parameter.
ssh [email protected] -i <key location>
Hopefully, all goes well, and you connect to the new server. For detailed instructions on configuring production Ubuntu, DigitalOcean created a tutorial.
Installing SQL Server
Now it's time to install SQL Server. The official Microsoft instructions are here. First, add the public GPG keys:
curl https://packages.microsoft.com/keys/microsoft.asc | apt-key add -
With the keys added, insert the list of packages into apt.
sudo add-apt-repository "$(wget -qO- https://packages.microsoft.com/config/ubuntu/16.04/mssql-server-2017.list)"
Update the package lists.
sudo apt-get update
Now apt can install the server.
sudo apt-get install -y mssql-server
After installation, configuration's required.
sudo /opt/mssql/bin/mssql-conf setup
A couple of notes here. If you don't have an MSSQL license, you'll probably want to go with MSSQL Express. It only stores up to 10 GB, but you can use it in production. Second, the password you set is the sa user password. This is the administration user. Once you make all your selections, you can check the status of the installation.
systemctl status mssql-server
Once the setup completes, you'll have a shiny new SQL Server. If you're on Mac, you can connect to it via Azure Data Studio.
Optional: Installing local tools
If you're looking to manage the SQL Server via ssh, you can install the MSSQL tools on the server. The first step is to import some more GPG keys.
curl https://packages.microsoft.com/keys/microsoft.asc | sudo apt-key add -
Add the list of packages to apt.
curl https://packages.microsoft.com/config/ubuntu/16.04/prod.list | sudo tee /etc/apt/sources.list.d/msprod.list
Update the package lists.
sudo apt-get update
Install the tools
sudo apt-get install mssql-tools unixodbc-dev
With the tools installed, connect to the server using the password provided in the setup.
sqlcmd -S localhost -U SA -P '<YourPassword>'
More information on this is provided by Microsoft.
Optional: Setting up a firewall
The droplet itself has a firewall, but if you prefer to set up a firewall on Ubuntu itself, I've provided the directions.
Note: It's discouraged to run both the droplet and Ubuntu firewall at the same time for troubleshooting.
If you decide to configure the Ubuntu firewall, use ufw. Before the firewall's enabled, making sure SSH stays connected is vital.
sudo ufw allow OpenSSH
Add the SQL Server default port.
sudo ufw allow 1433
Enable the firewall.
sudo ufw enable
Verify everything's working as expected.
sudo ufw status
Hopefully, this helps someone trying to get SQL Server on Ubuntu.